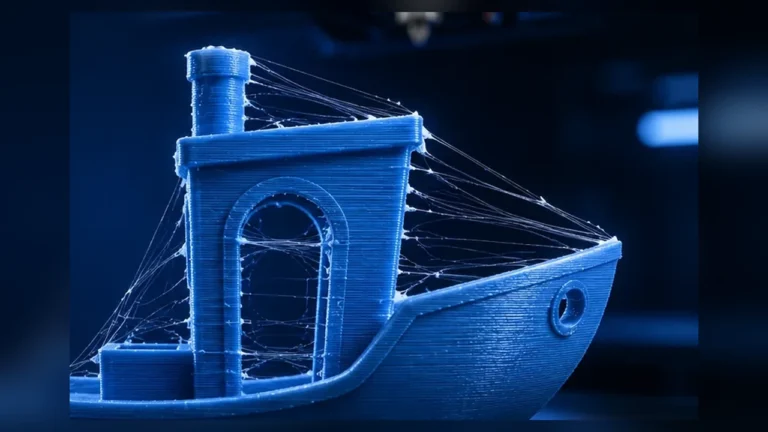
Many beginners assume that slower automatically means better quality. In 3D printing that is only partly true. Yes, some areas benefit from reduced speed – for example the first layer, visible outer walls or delicate details. But there are also real situations where a print becomes too slow and quality actually gets worse.
Typical symptoms include smeared top surfaces, slightly wavy finish, overheated small parts, weak bridges or corners that curl upward into the nozzle. Especially with small PLA parts these defects often look like the print simply needs “more care,” when in reality the nozzle may just be spending too much time over the same hot zone.

Can 3D printing really be too slow?
Yes. This is most common when small top surfaces, short layer times, relatively high nozzle temperature and limited part cooling come together. The problem is not that slow printing is always wrong. The problem is that speed has to be considered together with temperature, cooling, geometry and layer time.
- Slower can help when lines need more precise placement.
- Too slow can hurt when the nozzle keeps feeding heat back into the same local region.
- The real feature speed matters more than the headline speed printed on the profile.
A print can therefore run “slow and clean” on the outer walls while the top surface of the same model becomes overheated and messy because that specific feature is being printed too slowly.
How do you recognize a print that is too slow?
| Symptom | Typical direction | Check first |
|---|---|---|
| Top surface looks soft, wavy or smeared | local overheating caused by too little real movement | top-surface speed, global speed multiplier, temperature |
| Small tips or thin pillars go soft or lean over | layer time is too short and the nozzle returns too quickly | minimum layer time, printing multiple parts, cooling |
| Bridges sag even though the settings look “careful” | the nozzle stays over the hot strand too long | bridge speed, bridge flow, cooling, temperature |
| PETG finish becomes smeary instead of clean | too much heat combined with too little motion | temperature, fan, speed reduction |
| Corners curl upward and get hit by the nozzle | fresh layers are still too soft on the next pass | cooling, layer time, print order, Z-hop only secondarily |
Why printing too slowly causes problems
Extruded plastic needs a moment to stabilize. Under normal conditions this is handled by the balance of material behavior, nozzle temperature and part cooling. But if the nozzle moves very slowly, or keeps coming back to the same spot with very little time in between, the newly deposited line is reheated before it had a chance to firm up.
This is especially relevant for:
- small top surfaces,
- tiny details and small cross-sections,
- tall, narrow parts,
- bridges and short unsupported lines,
- temperature-sensitive materials such as PLA and PETG.
The result often does not look like a classic “speed problem.” Instead it resembles excessive temperature, too much flow or poor cooling. That is why the diagnosis is easy to miss.
The common trap: “half speed = double quality”
A very common real-world case is an additional global speed reduction through a multiplier or a quiet/silent mode. It sounds safe, but it can backfire. If your top surface is already printed at 35 mm/s and you cut the whole job to 50%, that feature now runs at only about 17.5 mm/s.
On a large flat area that may still be okay. On a small hot area it can be exactly the point where the surface turns soft, streaky or overworked.
Small parts: this is where layer time matters most
On small parts, the nominal mm/s value is only part of the story. What really matters is how quickly the nozzle comes back to the same area. If a layer only takes a few seconds, there is very little time to cool. In that situation even a supposedly “careful quality print” can overheat locally.
Typical countermeasures include:
- printing multiple parts at once so the nozzle alternates between them,
- using minimum layer time sensibly,
- raising part cooling where the material allows it,
- reducing nozzle temperature slightly,
- avoiding extremely low feature speeds.
Important: minimum layer time is not a magical repair switch. If the slicer responds by slowing the print down too far, that very safeguard can create new heat problems. In many cases, printing several parts or lowering temperature a little is the cleaner fix.
Too slow vs. too hot vs. too little cooling
These three causes overlap heavily, so it helps to separate them:
- Too hot: the material looks too soft even on larger areas.
- Too little cooling: small details and bridges fail to stabilize well.
- Too slow: the problem appears especially where the nozzle lingers or where multipliers drastically cut feature speed.
In real prints the issue is often a combination. That is why diagnosis should never depend on a single setting alone.
Which features really benefit from slower speed?
This topic should not be misunderstood as “slow printing is bad.” Quite the opposite: some features clearly benefit from reduced speed – just within a sensible range.
- First layer: better control over adhesion and line placement.
- Outer walls: cleaner contours and less mechanical ringing.
- Fine details: more controlled direction changes.
- Certain materials: for example PETG or some transparent filaments can benefit from moderate speed reduction.
So the lesson is not “never slow down.” The lesson is do not slow everything down blindly.
Top surfaces: one of the most common slow-print failures
A poor top surface is often attacked immediately with Ironing, flow tweaks or monotonic options. Those can help – but only if the foundation is already sound. If the visible top layer is being printed too slowly and stays too hot, Ironing will not fix the root cause.
Check first:
- How fast is the top surface actually being printed?
- Is there a global speed multiplier active?
- Is nozzle temperature already on the warm side for the material?
- Is the area small enough for local heat buildup?
- Are line width and layer height plausible?
If you have also been tuning your filament profile, our OrcaSlicer filament calibration workflow helps separate flow problems from heat-related issues.
Bridging: slower is not automatically better here either
Many users instinctively slow bridges down a lot. That can work, but it is not universally correct. On unsupported lines, slower motion also means the hot nozzle spends more time influencing the strand. That is one reason our dedicated guide on Bridging, Thick Bridges, Flow, Speed and Cooling treats bridge speed as a value that must be balanced with flow and cooling.
Short bridges and upper layers over internal voids can become surprisingly soft if the real bridge speed is too low.
Material differences: PLA, PETG, ABS/ASA
- PLA: often reacts very clearly to small hot zones. Soft tips, smeared top surfaces and raised corners are common signs.
- PETG: can quickly become glossy, smeary and sticky when too much heat is concentrated in one place. “Even slower” is often not the best answer.
- ABS/ASA: part cooling is more limited. If small details overheat, the better route is usually temperature, multiple parts or geometry changes rather than simply forcing maximum fan.
Practical troubleshooting workflow
- Isolate the problem area: does it affect only small details/surfaces or the whole print?
- Inspect slicer preview: what real speed does that feature actually have?
- Find multipliers: quiet modes, global speed modifiers or material limits may stack up.
- Check layer time: is the nozzle effectively circling in one tiny hot area?
- Vary temperature moderately: small steps are better than drastic jumps.
- Review cooling in a material-aware way: not every material wants 100% fan.
- Make a comparison print: test a moderate speed instead of an extreme slowdown.
- Change one variable at a time so the real cause remains visible.
Which LayerCompass tools help here?
If you want to judge whether the profile is sensible overall, several tools fit together:
- Nozzle, Layer & Speed Planner – to judge whether nozzle, layer height and speed combinations are reasonable.
- Volumetric Flow Calculator – to see the theoretical flow demand of a given setup.
- 3D Printing Troubleshooter – if you first want to classify the symptom broadly.
Important: a “too slow” problem is usually not a volumetric-flow-limit problem. If fast areas print cleanly but small slow features look bad, the real issue is more likely heat, layer time and feature speed than MVS.
Rule of thumb: moderate beats extreme
In many profiles, moderate slowing gives better quality than an ultra-slow approach. Outer walls a bit calmer, top surfaces still plausible, first layer controlled – yes. Blindly cutting everything in half – usually not.
If a print looks worse after you slow it down, that is not a contradiction. It is often just a sign that the balance between temperature, cooling and layer time has tipped the wrong way.
Conclusion
Yes, 3D printing can be too slow. This shows up most clearly on small parts, hot top surfaces, bridges and any area where the nozzle keeps feeding heat into the same local region. “Slower” is therefore not a universal law of quality. It is simply one tool – and like every tool, it only works well in the right range.
The best diagnosis does not ask only “How fast am I printing?” but rather: What is the true speed of this exact feature, how much cooling time does it get, and how does that fit the material and temperature?
Sources & current context
- OrcaSlicer Wiki – Speed Settings / Overhang & Bridge context
- OrcaSlicer Wiki – Cooling / feature-specific fan behavior
- Prusa Knowledge Base – general guidance on cooling, small parts and layer time
Practical context: 30 August 2026. Exact menu labels and interactions between speed, cooling and minimum layer time can vary between slicer versions.
Frequently asked questions
Can 3D printing really be too slow?
Yes. Small or hot regions can overheat if the real feature speed becomes too low, because freshly extruded lines are reheated before they have time to stabilize.
How do I know whether my print is too slow instead of too fast?
Common signs are soft or smeared top surfaces, small details that deform, or bridges that get worse despite “careful” settings. The real feature speed is the key clue.
Is printing slower not always better for quality?
No. Slower can help on outer walls or the first layer, but it becomes harmful when temperature, cooling and layer time no longer fit the geometry.
Why can Quiet or Silent mode make my top surface worse?
Because a top-surface speed that was already low may be cut in half again. On small surfaces that can cause local overheating and an overworked finish.
What helps when small parts get soft because the print is too slow?
Typical fixes are printing multiple parts at once, using minimum layer time sensibly, reducing temperature slightly, improving cooling where appropriate and avoiding extremely low feature speeds.