Maintenance checklist & workshop references
These LayerCompass graphics work as a quick maintenance checklist and condense the guide into visual workshop references. Download the full-resolution PNG files or open the A3 print PDFs. For model-specific lubrication points, intervals and service steps, the current manufacturer documentation always takes priority.
Illustrations created with AI assistance; technical content editorially reviewed.

Maintain Your 3D Printer Like a Pro
A broad workshop overview covering maintenance philosophy, intervals, major assemblies and manufacturer examples.

Maintenance Intervals & Manufacturer Overview
A compact reference with maintenance intervals, quick tips, tools, documentation fields and manufacturer examples.
Note: These posters are quick visual references. Always follow the latest maintenance instructions for your exact printer model, especially for lubrication, belt tension, replacement intervals and service procedures.
Modern 3D printers are much less maintenance-heavy than many older machines, but they are not maintenance-free. The important change is how maintenance should be approached: not as a ritual where every rod, screw and belt is treated the same, but as component-specific care based on the actual motion system, materials and symptoms.
A carbon rod, a linear rail, a lead screw, a V-wheel, an extruder gear and a nozzle wiper do completely different jobs. The safest rule is therefore simple: identify the component first, then follow the maintenance method intended for that component and printer model.
The most important rule: maintenance is component-specific
Old 3D-printing advice often treats the printer as one mechanical unit: “oil the axes,” “tighten the belts,” “clean the nozzle” and repeat every month. That is too crude for current machines. Two printers from the same brand can use completely different linear systems, and two printers from different brands may share nearly identical components.
For that reason, maintenance should be organized by build surface, filament path, hotend, cooling, motion system, belts, electronics and cleaning/wiping system. Brand-specific documentation then tells you how those components are implemented on the exact model.
What should actually be checked regularly?
| Component | What to inspect | Typical warning signs |
|---|---|---|
| Build plate | Grease, dust, adhesive residue, damage, correct seating | Poor or inconsistent first-layer adhesion |
| Nozzle & hotend | Plastic buildup, leaks, partial clog, silicone sock | Blobs, unstable flow, contamination around heater block |
| Extruder | Drive teeth, filament dust, idler pressure, bearings, PTFE guides | Clicking, slipping, intermittent underextrusion |
| Cooling | Fan startup, dust, airflow, unusual bearing noise | Heat creep, weak bridges, temperature-related failures |
| Motion system | Cleanliness, play, lubrication only where specified | Noise, binding, inconsistent surface quality |
| Belts & pulleys | Tracking, frayed edges, tension, pulley set screws | Layer shifts, artifacts, unusual motion noise |
| Nozzle wiper | Wear, debris, position, loose mount | Dirty nozzle after wipe, inconsistent first layer |
| Electronics & cables | Dust, filters, rubbing, heat discoloration, strain relief | Intermittent faults, fan noise, damaged insulation |
3D printer maintenance schedule: a checklist, not a rigid calendar
A useful maintenance schedule combines print hours, visible condition, material use and symptoms. Rules such as “lubricate everything every month” are too broad for modern FDM printers because rails, lead screws, carbon rods, belts, wipers and bearings can require very different care.
| When | What to inspect | Only if required |
|---|---|---|
| Before / after some prints | Build plate, nozzle tip, wiper/purge area, loose filament debris, unusual noises | Clean the plate, remove debris, correct an obvious cause |
| Periodically | Extruder, fans, belt tracking, cable motion, wiper, guides for dirt or unusual play | Clean or service the affected component according to manufacturer guidance |
| After substantial print hours | Wear parts and motion system more closely; inspect nozzle/drive gears earlier with abrasive materials | Replace only worn parts; lubricate only where specified |
| After service / part changes | Nozzle/hotend seating, wiring, toolhead, belts or sensors depending on the work performed | Rerun only calibrations affected by the service |
| Immediately when symptoms appear | New noises, debris, rough motion, recurring underextrusion, layer shifts, first-layer drift or fan issues | Diagnose the symptom instead of waiting for a calendar interval |
Manufacturer intervals can differ substantially. A combination of manufacturer guidance + print hours + actual condition is therefore more reliable than a universal schedule. A lightly used home printer does not need the same routine as a machine printing hundreds of hours per month.
Wear-part matrix: what degradation can look like
Declining print quality is not always a slicer problem. This quick matrix connects common wear signs to the symptoms they can create.
| Part | Wear signs | Possible effects | Useful next check |
|---|---|---|---|
| Nozzle | Changed tip/opening, gradual loss of detail, unusual flow behavior | Dimensional drift, inconsistent extrusion, lost detail | Compare with a known-good nozzle; use wear-resistant nozzles for abrasive materials where appropriate |
| Extruder gears | Filament dust, rounded/packed teeth, slipping | Intermittent underextrusion, filament grinding | Inspect and clean the filament path and drive gears |
| PTFE / filament guide | Grooves, deformation, increased friction | Feed inconsistency, retraction problems | Isolate the filament path and replace a damaged guide |
| Nozzle wiper | Tears, deep grooves, deformation, poor cleaning | Dirty nozzle; first-layer inconsistency on systems that reference nozzle contact | Clean the wiper/purge area and inspect its geometry |
| Build plate | Local adhesion loss despite correct cleaning, visible damage | First-layer problems, warping | Move a test part to another bed zone and compare |
| Fans | Bearing noise, poor startup, unstable speed, dust | Heat creep, poor bridges/overhangs, thermal issues | Inspect airflow and fan operation; do not compensate for a failing fan with slicer settings |
| Belts / idlers | Debris, fraying, poor tracking, unusual noise | Layer shifts, positioning errors, artifacts | Check alignment and model-specific tension guidance instead of blindly tightening |
| Silicone sock | Tears, deformation, baked-in plastic | Less thermal shielding, plastic buildup around heater block | Inspect and replace when damaged |
Maintenance issue or print defect? Avoid unnecessary repairs
Maintenance should remain symptom-driven. A suddenly bad print does not automatically mean the printer needs to be dismantled, lubricated or retensioned. Conversely, mechanical noise, debris or a failing fan should not be hidden with slicer tuning.
- Poor adhesion / first layer: inspect the plate, local contamination, wiper/nozzle and mesh/reference conditions first.
- Underextrusion: separate filament-path, nozzle/partial-clog, extruder and real volumetric-flow limits.
- Layer shift / new noises: inspect mechanics, belt tracking, collisions and motion before changing profiles.
- Heat creep / PLA feed problems: the hotend fan and airflow belong in the diagnosis.
- Poor bridges / overhangs: verify the part-cooling fan and ducts before changing temperature alone.
If the symptom is not obvious, use the 3D Printing Troubleshooter to separate maintenance, slicer, material and extrusion causes.
Build plate: cleanliness is maintenance, not slicer tuning
Fingerprints and residue can destroy first-layer consistency while the slicer profile remains perfectly correct. If adhesion suddenly gets worse, inspect and clean the surface before compensating with hotter temperatures, excessive squish or giant brims. Handle removable plates by the edges whenever possible.
For a deeper cleaning workflow, see How to Clean a 3D Printer Build Plate Properly.
Nozzle, hotend and silicone sock
Inspect the nozzle exterior for baked-on plastic and check for leaks around the heater block. A slow leak can grow into a large plastic mass that eventually stresses heater or thermistor wiring. A torn or displaced silicone sock can also change heat behavior and allow more material to collect around the block.
If a nozzle is replaced, follow the hotend’s exact installation procedure. Some designs require hot-tightening, others use replaceable assemblies or defined torque values. There is no universal nozzle-tightening rule that is safe for every hotend.
The nozzle wiper is easy to forget
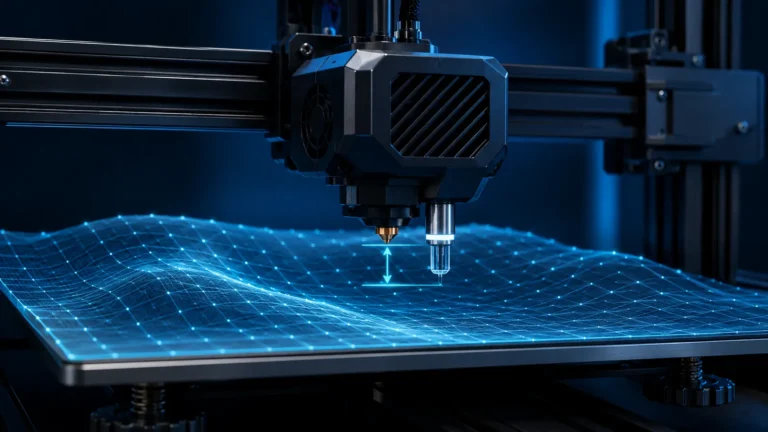
On many current printers the nozzle is cleaned automatically before probing or a first-layer routine. A worn, bent or contaminated wiper can therefore affect much more than cosmetic cleanliness. If the nozzle carries a blob into a contact-based Z-reference routine, the machine may measure the plastic instead of the true metal tip.
Our dedicated guide explains the full diagnostic chain: Nozzle Wipers & Automatic Z Reference.
Extruder wear is not the same as a clog
Drive gears wear, fill with filament dust and can lose bite. Idler preload can be too low, bearings can develop play, and a PTFE guide can deform or create drag. Broken filament can even wedge inside the extruder while the nozzle itself remains clear.
Typical clues include a polished groove in the filament, clicking only at higher flow, intermittent underextrusion or a feed problem that temporarily disappears after unloading and reloading. Inspect the entire feed path before repeatedly increasing flow.
Hotend fans: a small component with a large effect
The heatsink fan keeps the cold side of the hotend cold. Dust, damaged blades or restricted airflow can encourage heat creep, especially with PLA in a warm enclosure. This fan is not the same as the part-cooling fan; one protects the hotend’s thermal separation, the other cools the printed part.
Linear rails, smooth rods and carbon rods are not the same
This is where generic internet maintenance advice becomes risky. Some linear rails use a compatible oil or grease, some bearing-and-rod systems are maintained differently, and carbon rods on certain printers are designed to be cleaned rather than lubricated. Never transfer lubrication advice from one motion system to another without checking the manufacturer documentation.
Why “just use WD-40” is poor blanket advice
WD-40 is a brand with many different products, and the familiar water-displacing spray is not a universal long-term lubricant for printer motion systems. The wrong product can wash out existing grease, attract dirt or affect plastics and seals. Use the lubricant specified for the actual bearing, rail or screw.
Belts: neither guitar strings nor loose laundry lines
Inspect belt tracking, edge wear, rubber dust, pulley alignment and idler noise. More tension is not automatically better. Excessive tension raises motor and bearing loads and can create its own artifacts. If the manufacturer provides a frequency, gauge or calibration routine, use it instead of tensioning by feel.
Screws: do not routinely “tighten everything”
Critical fasteners should be secure, but repeatedly tightening every screw can damage threads, deform plastic parts or change alignment. Pay attention to fasteners that actually show movement, play or a documented torque requirement. Marking a suspicious screw can help reveal whether it is moving over time.
Electronics, fans and filters
Dust restricts airflow through electronics compartments and filters. Clean accessible air paths carefully without forcing debris deeper into the machine. A fan that starts slowly, stalls or becomes noisy should not be ignored; thermal problems are often intermittent before they become obvious failures.
Cables and cable chains: maintenance by observation
Look for rubbing, sharp bends, broken strain reliefs, exposed conductors and heat discoloration around connectors. Repeated-bend areas deserve particular attention. Electrical damage, melted connectors or loose mains wiring are not routine slicer issues and should be treated as safety faults.
Manufacturer differences: what current documentation teaches us
Bambu Lab
Bambu machines use different motion systems across product families. Maintenance can include rod or rail cleaning, belt inspection, filter and fan cleaning, nozzle-wiper care and model-specific lubrication. Carbon rods should never be treated as generic steel rods.
Prusa Research
Prusa publishes detailed service procedures and maintenance guidance tied to print hours and specific components. Their documentation is a good example of why a current model-specific procedure is more useful than a universal schedule.
Creality
Current Creality platforms range from V-wheel bedslingers to enclosed CoreXY machines. Belt, rail, lead-screw and wiper maintenance therefore varies substantially by model.
Elegoo
Modern Elegoo FDM machines combine linear motion, Z mechanisms, PEI build surfaces and enclosure components. Check the exact model documentation before lubricating rails or screws.
Snapmaker
Toolheads and multi-function systems make cleanliness, calibration and mechanical seating particularly important. Toolchanger systems also add tool-offset and nozzle-condition considerations.
Flashforge
Check rails, rollers, hotend cleanliness, fans and any model-specific lubrication points. Enclosed printers should also be inspected for dust buildup in air paths.
QIDI
QIDI’s enclosed high-temperature machines place additional emphasis on chamber airflow, Z mechanisms, filters and lubrication specified for the linear system.
Sovol
Sovol machines vary from classic bedslingers to CoreXY platforms with advanced probing. Belt condition, motion hardware, sensor calibration and nozzle cleaning should be assessed according to the exact model.
Which lubricants belong in the workshop?
A small set of manufacturer-approved lubricants is better than a shelf full of generic sprays. Depending on the printer, that may include a light machine oil, PTFE-compatible grease or another specified lubricant. Label them clearly and avoid cross-contamination.
Too much lubricant also causes wear
Excess grease traps dust and filament particles. It can migrate onto belts, sensors or build surfaces and may increase drag. Apply only enough to create the intended film, then remove obvious excess where the manufacturer instructs.
When should you recalibrate after maintenance?
Do not automatically run every calibration routine after wiping dust from a fan. Recalibrate when the work can affect geometry, tool position, nozzle reference, belts, toolheads or motion. Nozzle replacement, toolhead service, belt work and sensor changes are much more likely to justify recalibration than routine surface cleaning.
Abrasive filament shortens some intervals
CF, GF, glow and other filled materials can accelerate nozzle and extruder wear. Inspect drive gears, nozzle diameter, filament guides and high-flow behavior more frequently. A nozzle can remain “open” while its diameter or internal geometry has already changed enough to affect dimensional quality.
Keep a maintenance log instead of relying on memory
Record date, print hours, work performed, replacement parts and observations. A short log makes gradual changes obvious: a belt that repeatedly needs adjustment, a fan that becomes noisy every few hundred hours or a nozzle whose reliable flow limit keeps falling.
Symptoms that should not wait for the next interval
- new grinding, clicking or scraping noises,
- visible cable or connector damage,
- melted plastic around wiring,
- repeated layer shifts,
- rapidly changing first-layer behavior,
- persistent underextrusion despite a clean nozzle,
- excessive play in motion components.
The LayerCompass maintenance routine
- Observe: listen, look and compare behavior to the machine’s normal baseline.
- Clean: build surface, nozzle, fans and accessible debris.
- Inspect: feed path, wiper, belts, motion and cables.
- Lubricate only where specified.
- Change one thing at a time.
- Recalibrate only what the service work can actually affect.
- Document the result.
Conclusion: modern maintenance means less guesswork
The goal is not to service more often; it is to service more intelligently. Clean what must stay clean, lubricate only what requires lubrication, inspect wear before it becomes a failure and use model-specific documentation whenever the component design matters.
Turn symptoms into maintenance decisions
Scheduled maintenance is useful, but symptom-based inspection is often more valuable on a modern printer. A new noise, a change in surface texture or a first layer that suddenly becomes inconsistent can point to a specific component long before a generic service interval is reached.
| Symptom | First components to inspect | Do not assume immediately |
|---|---|---|
| Random underextrusion | Drive gears, idler pressure, filament path, hotend fan, nozzle | That the slicer flow value is wrong |
| Repeating horizontal texture | Z motion, pulleys, belts, extruder periodicity | That every band is “Z wobble” |
| First layer changes from print to print | Plate surface, nozzle tip, wiper, probing sequence | That a permanent Z-offset change is needed |
| New ringing or motion noise | Belt tension, pulley set screws, idlers, loose toolhead parts | That Input Shaper alone will solve it |
| PLA stops feeding after a while | Hotend fan, heatsink airflow, enclosure temperature | That the nozzle is simply clogged |
Build surfaces can wear out
Cleaning is the first response to poor adhesion, but it is not the only one. PEI coatings, textured surfaces and specialty plates are consumable components. Repeated flexing, scraping, aggressive chemicals, excessive nozzle contact or simply many print cycles can change the surface. If one area remains unreliable after proper cleaning while another area still works, surface wear becomes a realistic diagnosis.
Do not compensate indefinitely with more bed temperature or more first-layer squish. That can hide a worn surface while creating elephant foot, difficult part removal or nozzle-to-bed contact.
Nozzle wear belongs in the maintenance plan
A nozzle does not need to be fully blocked to be worn. Abrasive filaments can enlarge the orifice and damage the exit geometry. Even with ordinary materials, a damaged tip can produce inconsistent line width, rough walls or a first layer that looks less uniform than expected. Hardened nozzles last longer with abrasive composites, but they are not immune to wear.
Useful clues include poor walls despite correct flow calibration, inconsistent extrusion direction, unexplained dimensional drift and a nozzle diameter that no longer behaves like the nominal size. Before changing motion settings, inspect or replace a suspicious nozzle with a known-good part.
Belt tension should be checked, not guessed
Belts slowly change with use, temperature and mechanical settling. Too little tension can allow backlash-like movement, poor positional consistency or skipped motion under aggressive acceleration. Too much tension can overload motor bearings, idlers and linear components. The correct target is therefore not “as tight as possible,” but the manufacturer’s intended tension range.
If a printer offers a belt-frequency tool, app, built-in calibration or a model-specific procedure, use it. If not, compare both axes for tracking, edge wear and pulley alignment before changing tension.
Stepper motors and drivers: rare, but not impossible
Stepper motors are generally reliable, so they should not be the first suspect for ordinary print artifacts. However, a damaged connector, intermittent phase, overheated driver, failing bearing or motor with abnormal resistance can create rough motion, lost steps or periodic artifacts. The key is corroborating evidence: unusual motor noise, excess heat, axis-specific behavior, errors that persist after mechanical checks, or a fault that follows a swapped motor/driver channel during controlled service testing.
A practical interval strategy
- Every few prints: glance at the nozzle, wiper, plate and waste path.
- Regularly: inspect belts, fans, filament dust and visible cable movement.
- After abrasive-material runs: give the nozzle and extruder more attention.
- After a collision or major jam: inspect motion, nozzle, hotend mounting and calibration before assuming the printer is unchanged.
- After replacing mechanical parts: run only the calibrations that are actually affected.
This approach keeps maintenance proportional to real wear instead of turning the printer into a monthly disassembly project.