
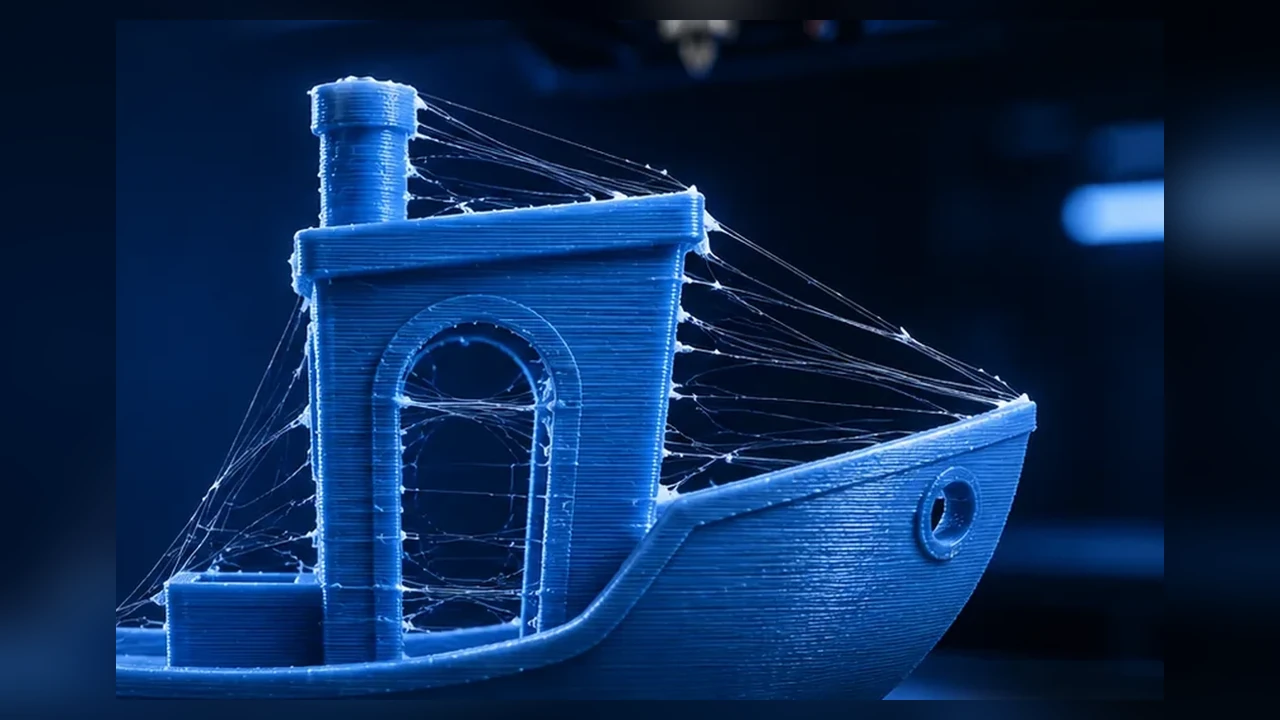
Stringing is one of the most common FDM print defects: fine strands appear between separate sections even though the slicer did not plan extrusion there. The reflex answer is often “increase retraction.” That can help, but on modern direct-drive printers it is frequently not the best first move.
A better diagnosis starts with a different question: why is there still so much pressure or low-viscosity melt at the nozzle during a travel move? Moisture, temperature, travel time, retraction, Pressure Advance, seam behavior and the filament formulation can all produce a similar visible symptom.
Real stringing vs. defects that only look similar
Classic stringing is a thin strand pulled from one printed area to another during a non-extrusion move. Larger droplets, pimples or excess material at starts and stops are more likely seam, flow or Pressure Advance issues.
| Symptom | Likely direction | First useful test |
|---|---|---|
| very fine webs | temperature / moisture | filament condition + temperature |
| thick strands between towers | retraction / travel / ooze | travel and moderate retraction test |
| strings plus popping/bubbles | moisture | dry according to material guidance |
| blobs at the seam | flow / PA / seam | check Flow Ratio and Pressure Advance |
| only at high-speed profiles | temperature / flow / dynamics | check MVS and PA |
1. Check filament condition first
Hygroscopic filaments absorb water from the air. In the hotend that water can vaporize and make extrusion unstable. Popping, bubbles, rough surfaces and increased stringing are common companion symptoms. PETG, TPU, PA/Nylon and many engineering materials are particularly sensitive.
A retraction tower printed with wet filament can send you in the wrong direction. You may end up with an extreme retraction value that only masks the moisture problem.
2. Test temperature at realistic flow
Higher temperature lowers melt viscosity. That helps at high volumetric flow but can increase ooze. A slightly lower temperature may therefore reduce stringing as long as layer bonding and melt capacity remain adequate.
A common mistake is running a very slow temperature tower and then using that result for a much faster profile. Temperature testing should be reasonably close to the actual speed and flow conditions.
3. Travel speed, acceleration and path planning
The longer the nozzle spends travelling between features, the more time it has to ooze. Faster travel can reduce stringing, but short moves may never reach the requested speed because acceleration limits dominate.
Keeping travels inside already printed regions can also hide visible strands on outer surfaces. It is useful path planning, not a replacement for fixing excessive ooze.
4. Retraction distance: use as little as necessary
Retraction pulls filament back before a travel move to reduce nozzle pressure. Modern direct-drive systems generally need much shorter distances than old long-Bowden setups. Multi-millimeter internet defaults are not universal values.
Too little retraction leaves pressure behind. Too much can delay extrusion after travel, deform filament or aggravate heat-creep/clog risks in some hotends. The goal is the smallest reliably effective value.
5. Retraction speed is not “faster is always better”
Higher retraction speed releases pressure more quickly but can grind filament, deform flexible materials or stress the feeder. Test speed and distance independently. OrcaSlicer includes a dedicated Retraction calibration test for this reason.
6. Tune Pressure Advance before extreme retraction
Pressure in the extrusion system does not change instantly when the toolhead accelerates or decelerates. Pressure Advance compensates for that dynamic behavior. Klipper explicitly notes that correctly configured Pressure Advance can reduce ooze and reduce the retraction length required.
If corners are already bulging because pressure remains high during deceleration, huge retraction values are often treating the symptom. Flow Ratio and Pressure Advance should be plausible before final retraction tuning.
7. Wipe can help; use coasting cautiously
Wipe moves can place residual material onto an already printed path and are useful as a finishing tool. Classic coasting stops extrusion early before the end of a path; with modern firmware and slicer workflows, correctly tuned extrusion dynamics are usually the cleaner foundation.
8. PETG, TPU and PLA behave differently
PETG
PETG is often labelled a “stringy” material, but moisture, formulation and temperature strongly affect the result. Check filament condition and temperature before accepting large retraction values.
TPU
TPU compresses inside the filament path. Large or very fast retractions can deform it and make feeding less reliable. A short controlled path and moderate retraction are normally more useful.
PLA / PLA+
PLA is usually easier to control. If stringing suddenly becomes much worse with an unchanged profile, check moisture, color/formulation changes, room temperature and the filament path.
9. After a nozzle or material change
Retraction is not just a “printer value.” Nozzle geometry, melt zone, material viscosity and temperature all change the pressure behavior. Revalidate when those conditions change significantly.
Recommended diagnostic workflow
- Classify the defect: true strings or seam/blobs?
- Check filament condition.
- Validate temperature at realistic print speed.
- Calibrate or verify Flow Ratio.
- Check Pressure Advance / Flow Dynamics.
- Check travel speed and path planning.
- Fine-tune retraction distance.
- Use retraction speed and wipe as finishing adjustments.
When a stringing tower can mislead you
Synthetic towers intentionally create many short travels. They are useful, but a value that makes the tower marginally cleaner can make real parts worse through delayed extrusion, poor seams or unnecessary print time. Always validate on real geometry.
Z-hop and stringing
Z-hop lifts the nozzle during travels. It does not stop ooze and can even increase travel length. Treat it as a collision/surface feature, not a replacement for correct retraction.
If strings remain after good retraction tuning
Inspect the nozzle and hotend. Heavy buildup, wear or a partial clog can change how material leaves the nozzle. More retraction is not the right response to every persistent strand.
Stringing only in one region of the model
If the defect appears only in one area, geometry and travel planning may matter more than the global filament profile. Inspect G-code preview for long open travels, frequent seam changes or isolated islands.
Conclusion
Stringing is a diagnostic problem, not a single retraction knob. A robust order is filament → temperature → flow/PA → travel → retraction → wipe. This usually produces lower, more stable retraction values and avoids masking moisture or extrusion-dynamics problems.


