Many current 3D printers do far more before a print than simply home the axes. They heat the nozzle, purge, wipe, cool, probe and sometimes use the nozzle itself as part of the Z-reference system. That makes the nozzle wiper a precision component, not just a convenience feature.
If a small filament blob remains on the nozzle tip, the consequence depends on the sensor design. On systems that use the nozzle as a physical contact point, the measured contact can shift. On other machines, a dirty nozzle may instead disturb extrusion, wiping or the real nozzle-to-bed gap. The important lesson is: wiper, nozzle tip and probing method must be considered together.
Why the nozzle tip can become part of the measurement chain
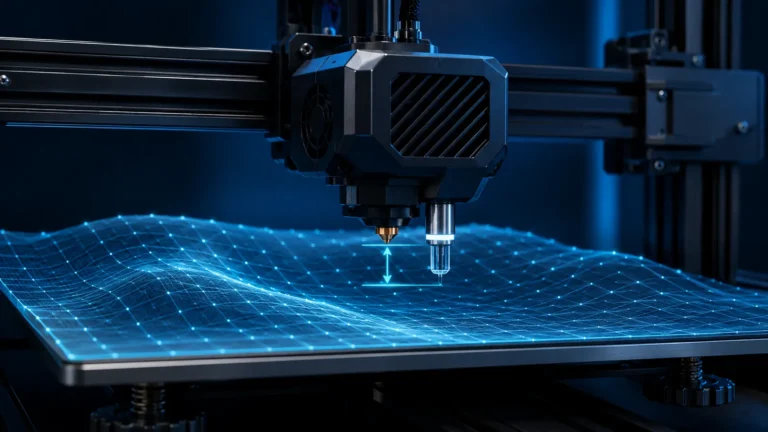
On older printers with a separate endstop or inductive probe, the nozzle was not necessarily part of Z measurement. Many current machines use load cells, force sensors or contact-based routines in which the printer detects the nozzle touching the bed or a reference surface. In those systems the geometric bottom of the metal nozzle is part of the reference.
A hardened bead of plastic on the tip can become the first contact point. The machine then measures the bead instead of the nozzle. The symptom can look like a changed Z offset even though the stored value never moved.
What a modern nozzle wiper actually does
Wipers can be made from silicone, metal, brushes, scraper surfaces, cleaning pads or several stages. Their job is not only to remove a cosmetic string. They create a repeatable nozzle condition before probing, purging, tool-offset calibration or the first extrusion move.
Some systems use a soft silicone wipe for bulk material and a second metal or textured surface to clean the nozzle face more precisely. If the wiper misses the nozzle or is deformed, the cleaning sequence can be inconsistent from print to print.
Typical wear patterns
| What you see | Possible effect | What to check |
|---|---|---|
| Torn or deeply grooved silicone lip | Plastic remains on one side of the nozzle | Shape, elasticity and nozzle contact |
| Brush packed with plastic | Old debris is redistributed instead of removed | Filament fragments, sticky deposits, bent bristles |
| Bent metal scraper | Wiping height or contact point changes | Position against the manufacturer reference |
| Loose wiper mount | Cleaning result varies between prints | Fasteners, play and mounting surface |
| Nozzle misses the intended area | Incomplete cleaning or possible collision | Wipe position, calibration and toolhead alignment |
| Waste area packed with purge debris | Wiper movement or purge path is obstructed | Waste chute, purge bucket and surrounding area |
The classic symptom: first layer suddenly too high or too low
This is especially confusing on printers that probe before every print. A small blob may be present during one probing cycle and gone during the next. One print looks perfect, the next appears too high, and after reheating the machine behaves normally again.
If you permanently adjust Z offset at this point, you may compensate for a temporary contamination problem. Once the nozzle is clean again, your new offset becomes the error.
Manufacturer examples: what current systems illustrate
Bambu Lab
Bambu systems use automated cleaning routines and model-specific wipers. The practical takeaway is to inspect whether the wiping surface is clean, correctly seated and mechanically intact before blaming automatic calibration.
Prusa
Prusa documents the connection between a clean nozzle and contact-based probing very clearly. Nozzle contamination can disturb a force measurement, and clean nozzle tips are also important for tool-offset routines.
Creality
Recent Creality platforms include automated nozzle-cleaning and replaceable wipe components. If the nozzle no longer contacts the wiper correctly, inspect the mechanism before treating leveling as the root cause.
Snapmaker
On multi-tool and toolchanger-style systems, nozzle cleanliness matters for both first-layer behavior and reproducible tool geometry. A contaminated tip can affect more than one calibration relationship.
Flashforge and QIDI
Both brands use different combinations of enclosed machines, probing systems and nozzle-cleaning routines. The useful rule is to identify whether the machine references the nozzle itself or a separate sensor.
Sovol
Sovol systems may combine eddy-current, inductive or other probing methods with separate nozzle-cleaning behavior. A dirty nozzle does not affect every sensor in the same way, so sensor architecture matters.
Not every automatic leveling system reacts the same way
A load-cell printer can be directly influenced by material on the nozzle tip. A machine using a separate probe may still measure bed geometry correctly while the dirty nozzle changes the real first-layer gap or extrusion. That is why statements such as “a dirty nozzle always corrupts bed mesh” are too broad.
How to inspect the wiper and nozzle systematically
- Let the printer cool before touching the toolhead.
- Inspect the wiper visually: tears, grooves, deformation, loose mounting and filament residue.
- Check the purge/waste area: hard pieces can block the wiper or its travel.
- Inspect the nozzle tip: distinguish a hard bead from a thin string.
- Watch one wipe sequence: does the nozzle actually hit the intended area?
- Clean and recalibrate: only now rerun homing, bed mesh or the first-layer routine.
- Compare the result: do not change flow, Z offset, bed temperature and wiper geometry at the same time.
Nozzle cleaning: one brush does not fit every nozzle
A brass brush is common for many conventional metal nozzles, but it is not automatically appropriate for every coating or hotend assembly. Coated nozzles can be more sensitive, and aggressive brushing can damage nearby heater or thermistor wiring. The hotend manufacturer’s cleaning recommendation takes priority.
Why tearing off cold filament can be risky
A fully cooled PETG or TPU lump can grip the nozzle, silicone sock or surrounding components strongly. Pulling it off sideways with force can stress thin heatbreaks, heater wiring or the wiper mount. Controlled warming is often safer than brute force, but only within the manufacturer’s service guidance.
When should the wiper be replaced?
Replace it when its geometry is no longer stable: deep grooves, tears, missing material, permanently bent metal parts, excessive play or repeated failure to clean the same nozzle area. A wiper is a wear item. If cleaning only helps for a few prints, replacement is often more sensible than compensating elsewhere.
Material matters
PETG can leave sticky strings and blobs, TPU can smear across wiping surfaces, and some filled materials generate more abrasive dust. A maintenance interval that works perfectly with clean PLA may therefore be too long for another material mix.
Wiper clean, first layer still wrong?
A clean wiper removes one variable; it does not prove the rest of the system is correct. Continue with build-plate contamination, plate seating, sensor calibration, gantry alignment, nozzle installation and extrusion consistency. Use the 3D Printing Troubleshooter to narrow the symptom down.
The most common thinking error: “I will just adjust Z offset”
Manual Z-offset correction is appropriate on systems that actually require manual offset tuning. It is not a good first response when a printer normally establishes its own Z reference and the error appeared suddenly. Verify the mechanical and cleaning references before overriding the result.
Practical checklist
- Nozzle tip free of hardened plastic.
- Wiper not torn, bent or loose.
- Waste chute/purge area not blocking movement.
- Build plate clean and seated correctly.
- Automatic calibration rerun after cleaning.
- Z offset changed only after the mechanical references are verified.
Three different ways a dirty nozzle can cause trouble
A dirty nozzle is often discussed as if there were only one failure mechanism. In practice, it can affect a modern printer in at least three different ways:
- Reference error: on nozzle-contact or load-cell systems, plastic on the tip can change when contact is detected.
- Extrusion-start error: residue can drag across the plate or interfere with the first deposited line even when probing itself uses a separate sensor.
- Wipe-sequence error: a worn or displaced wiper may leave a larger blob on one cycle than another, creating an intermittent rather than repeatable problem.
This distinction matters because the same visible first-layer symptom can require a different fix depending on the sensor architecture.
Contact probe, separate probe and eddy-current systems
| System type | How nozzle contamination matters | First diagnostic priority |
|---|---|---|
| Nozzle contact / load cell | Can directly alter the physical contact point | Clean metal tip, verify wipe, repeat homing |
| Separate probe | Usually does not change probe trigger directly, but nozzle residue still changes the true extrusion height | Probe integrity plus nozzle cleanliness |
| Eddy-current / non-contact sensing | Bed sensing itself may be independent of the nozzle, but offset and mechanical reference still matter | Sensor calibration, mounting and nozzle condition as separate checks |
Wiper alignment is as important as wiper material
A perfectly good silicone pad or brush cannot clean reliably if the nozzle only clips one edge. After transport, a nozzle crash, maintenance or replacement of the purge assembly, check whether the nozzle travels through the intended wipe path. Look for asymmetric wear marks, filament consistently accumulating on one side or the nozzle visibly missing part of the cleaning surface.
Do not confuse a worn wiper with a worn nozzle
If the wiper cleans correctly but extrusion lines remain rough, the nozzle itself may be worn or damaged. A deformed exit can leave a clean-looking tip while still producing poor line geometry. This becomes more likely after long use with carbon-, glass- or glow-filled materials.
Conversely, replacing the nozzle will not fix a wiper that is torn, loose or covered in hardened plastic. Inspect both parts as a system.
When the correct action is recalibration
Cleaning alone is usually enough when the error came from temporary residue. Recalibration becomes more sensible after replacing the hotend/nozzle assembly, changing a probe, moving the toolhead mechanically or replacing a wiper whose position is part of an automated reference routine. Avoid recalibrating simply because one dirty first layer occurred; first remove the temporary cause.
Conclusion
The nozzle wiper looks like a minor consumable, but on modern printers it can sit directly inside the chain that determines first-layer consistency. Treating it as a precision maintenance part makes troubleshooting faster and prevents unnecessary slicer compensation.